
The Easiest Sourdough Bread
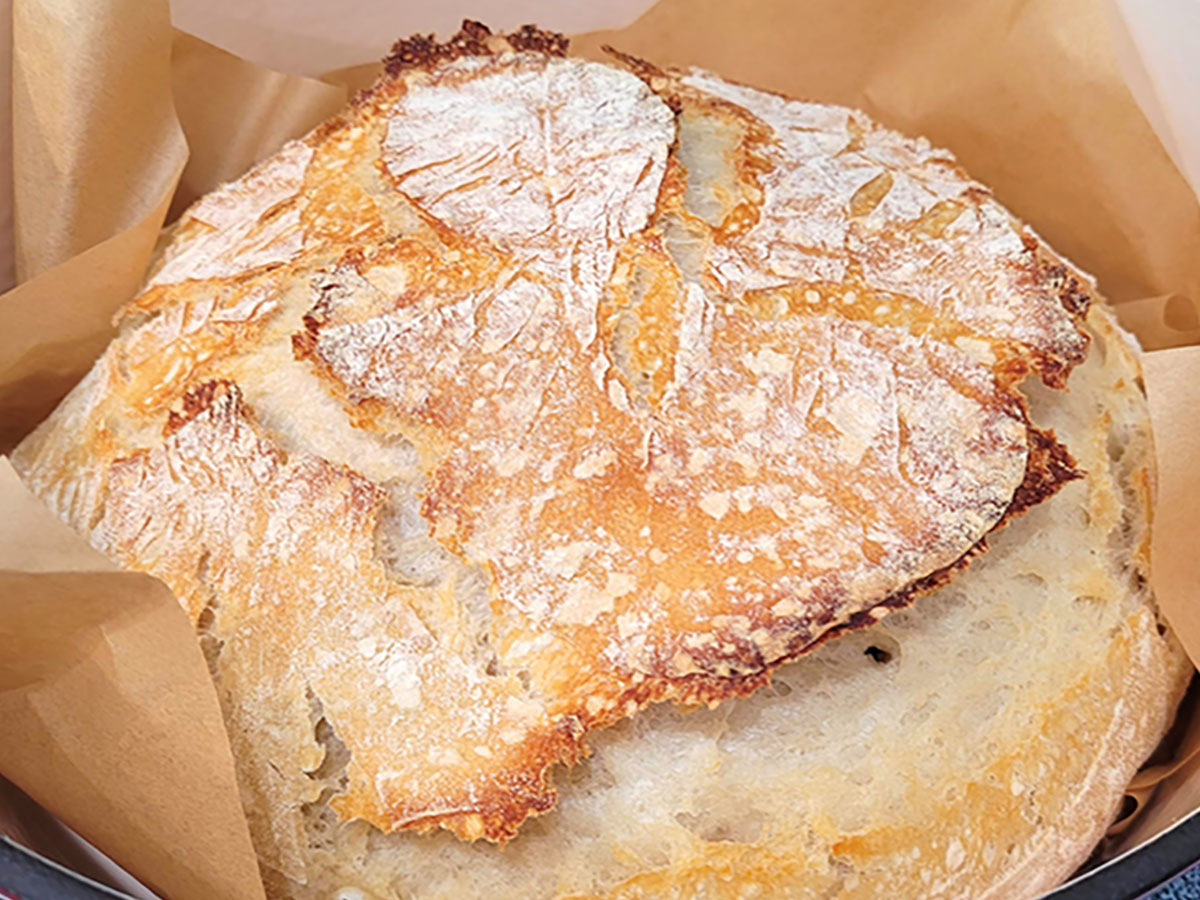
Creating Your First Classic Sourdough Bread Loaf
With your sourdough starter active and bubbly, you’re excited to create that first, beautiful loaf of classic sourdough bread. At first glance many sourdough bread recipes look quite involved, but generally they’re simple and maintenance. Preparation usually starts about 24 hours in advance of baking, but has a hands-on time of only about 15 minutes.
A Note About Tools
While there are lots of fun tools you can collect on your journey to the best sourdough bread, I recommend starting simple and minimal. You can always add more supplies as your skills and interest grow. As you experiment, you will find you prefer one method or tool over another. Patience gives you time to explore before you buy. You can probably even borrow a Dutch oven; perhaps the most expensive tool in your sourdough bread arsenal.
I suggest reading through any sourdough bread recipe multiple times before you actually start the process. Terms or instructions you may not understand can be searched out on the Internet or demonstrated by a friend or mentor. I find the sourdough community generous and willing to impart all the tips and tricks to help you succeed.
Lots of Options
There are tons of recipes online and hundreds of books available to help you learn more about the art of sourdough bread baking. I would recommend you try a few different resources to find the method you are most comfortable with. Some of my personal favorites include Anita Sumer, Breadtopia, and King Arthur Flour.
I’ve included lots of information in the Notes on this recipe, but feel free to reach out either here or on my Instagram if you have any questions. I love to help!

Classic Sourdough Bread
Equipment
- 1 large bowl w. lid
- 1 banneton or bowl
- 1 4 – 6 qt Dutch oven with lid
- 1 parchment sheet
- 1 bread lame or knife
Ingredients
- 300 g water about 80°F
- 150 g bubbly sourdough starter
- 1 tsp instant yeast optional (see notes)
- 10 g salt
- 500 g flour mixture of flours optional
Instructions
- Feed Starter: Approximately 24 hours prior to baking, feed sourdough starter 75 g water and 75 g flour; let expand. Keep an eye on it and try to use the starter at peak growth. Warm weather conditions can cause faster growth; cooler conditions may produce slower growth.
- Mix: Approximately 12 hours prior to baking (when starter is at it's peak), in a large bowl or bowl of stand mixer, combine water, bubbly starter, and instant yeast, if using (see notes); stir lightly.
- Add flour and mix until dough cleans the sides of the bowl. Dough will be soft, but should not be too sticky.
- If mixed in a bowl with a center beater unit (Bosch, Nutrimill, etc.), remove dough from mixer, smooth into a ball, and place in a large bowl with room to work. Otherwise, dough can be left in the same mixing bowl.
- Fold: Over the next hour, about every ten minutes, pull and turn the dough. Wet your hands lightly to keep them from sticking. Pull dough up from one side, lift just until dough resists the pull, then fold over toward the center of the ball. Turn the bowl a quarter turn and repeat three times more (a total of four folds).
- Bulk Rise: Smooth the dough into a nice ball. Leave in the same bowl and cover. Allow to rise for 6 – 8 hours until roughly doubled in size. If timing is off (such as the dough would be doubled in the middle of the night), you can allow the dough to rise in the refrigerator for all or a portion of the bulk rise (see notes).
- Laminate: Pour the dough onto a floured surface. Being careful not to tear the dough, gently "pull" it, stretching it into a large square. Only stretch as far as the dough allows. Try to feel the dough stretch and don't pull it too thin or allow it to tear.
- Shape: Starting at the top, fold the dough like an envelope. Gently lift and fold the top third of the laminated dough over the center third. Then lift and fold the bottom third over the center. Next, lift and fold one side (left or right third) over the center, and, finally, the opposite side over. Then carefully turn the seam sides up and pinched them together to smooth the ball. Rest the ball on the counter, put your hands around the backside (furthest) from you, and gently pull the ball toward you, "dragging" the ball. The goal is to tighten the top of the dough ball. Move slowly and only pull it a couple of times. Try not to overwork the dough at this point.
- Final Rise: Place the dough, smoothest side down, in a floured banneton, bowl, or Dutch oven lined with parchment paper. Allow to rise about two hours, until a bit puffy, but not doubled in size (doubling could cause over-proofing). If you poke it with your finger, it should leave a slight mark. Be sure to preheat the oven mid-way through the final rise (see next step).
- During the last half of the final rise, preheat the oven and Dutch oven to 500°F. Most people feel preheating the Dutch oven (or baking vessel) gives the bread the best rise, but some people prefer not to preheat (see notes). Your personal preference will develop over time.
- Score: Just before baking, turn the loaf out onto a piece of parchment paper. Score the top of the loaf if you would like to control the way the loaf pops open (see notes). Then pick the loaf up by the parchment sheet and set it in the preheated Dutch oven. Put the lid on and put it in the center of the oven.
- Bake the loaf at 425° for 45 minutes. If you like a darker crust, remove the lid after 30 minutes. If you prefer a crispier all-around crust, remove the boule from the Dutch oven at the end of cooking time and place the loaf directly back on the rack in the oven for 3 – 5 minutes.
- Cool: Allow the boule to cool for at least an hour before cutting. I know! Waiting is the worst! But the boule will continue cooking for a while after it comes out of the oven. Cutting into the bread sooner can cause the crumb to collapse or become gummy. It's worth it to wait.
- Storage: There are so many options for storing sourdough. Many people simply leave it on a wood cutting board with the cut side down. You can also leave it in the open but with the cut end covered with aluminum foil. Both of these options help preserve the crust. There are also paper and plastic bags available at many larger supermarkets or Amazon. If we're going through the bread rapidly (within 2-3 days, I will leave it on the cutting board with the cut side down. Otherwise, I slice the loaf completely, place it in a plastic bread bag, and store it in the freezer. We can take a slice or two out of the freezer and within minutes have sourdough that feels and tastes as fresh as just baked.
Notes
- Mix: The rising power of sourdough starters will get stronger over time. The first few loaves you bake may not have the greatest crumb structure or raise very much more than when you put it in the oven. Don’t give up! It takes time for the gluten structure to develop strength. If you keep using your starter regularly (once a week or so), it will grow stronger and more viable over time.
- Mix: Because natural yeast can take time to develop or be a little finicky depending on weather and other conditions, I believe there is NO SHAME in adding a bit of baker’s or commercial instant yeast to sourdough. Even French bakeries are known to regularly use commercial yeast in their baked goods. It’s all about the final product. Even now, I regularly add 1/2 – 1 tsp of commercial yeast to my breads because I like to add a bit of whole wheat flour to my loaves. Whole wheat flour can be more dense and heavier and need a little extra lift. I love that my breads are basically sourdough. The tiny bit of commercial yeast is not a problem for me.
- Bulk Rise: The refrigerator can be your friend in extending rise times, if needed. If your dough is taking a while to rise and would be ready in the middle of the night, cover it and put it in the fridge. It will last in the fridge for up to 24 hours (some say as much as 48 hours, but I have not personally tested that yet). When your ready to work with the dough again, take it out of the fridge and let rest at room temperature for about an hour before proceeding with the lamination process.
- Final Rise: Dutch ovens are a classic way of baking sourdough bread. A Dutch oven will help retain the moisture that evaporates from the bread dough which gives a nice crust. Some people prefer to preheat their Dutch oven and some do not. I’ve seen nice, crusty sourdough loaves with both methods. I personally use a Lodge 3.2 quart Cast Iron Combo Cooker and preheat it. They’re decently priced on Amazon, multi-function, and, in my opinion, super easy to work with. I also have a very inexpensive 365+ Ikea pan with glass lid that works fine. Use what you have if you’re not sure you’re ready to invest.
- Score: Because of the moisture content in sourdough, the steam will look for an escape route. You can provide a direction for the steam by using a bread lame or very sharp knife to score the top of the boule. This score can be a simple slice along one side of the top of the loaf, or it can be fancy. You can also leave it be and allow the steam to burst out on it’s own. Some bakers prefer the nice, clean designs of the cut, and some love the rustic feel of the burst. Again, your preference will develop and there are lots of fun designs. A simple Pinterest or Google search should provide tons inspiration.


[…] for baking. If you’re looking for a simple sourdough bread to get started with, check out my Simple, Classic Sourdough Bread recipe. Once it reaches full peak, if you don’t use it, the starter will start to die down […]